A bare wall is a license to thrill. While you may look at it with misery wondering how on earth you are going to bring life to it, do not despair - an empty wall is simply an opportunity for you to start afresh and express your unique brand of thinking! It’s your chance to make your house feel like home, and no doubt you will be keen to achieve that as soon as possible, for it helps us feel comfortable in a new and alien environment.
One of the more traditional ways to fill up a wall in your living room or bedroom would be to transform it into a gallery wall. It’s a great way to dust off the photos that have been neglected in the albums and instead display them for family and guests alike. The walls will serve as an ode to memorable times, a story of where you’ve been and who you are. They can also be an expression of your personality or more ordinary day-to-day life if you display photos of your favourite hobbies, pets and so much more! You can display mementoes of special events like birthdays, weddings and other such celebrations. Of course, instead of the theme being family or memories, you could go more abstract with photos of scenery or quirky quotes – pretty much anything that gives an idea of who you are and how you function! If you have a favourite musician or a favourite place in the world or even a favourite flag, you can buy a professionally shot high-quality photo and then frame and hang it. Either way, it’s a great way to personalise a room rather than to simply decorate it with flowers or wallpaper that may not necessarily mean as much to you or say much about you either.
Another bonus is it’s a great way to decorate without risking knocking things off the shelves, as everything is hung up securely so that even the little ones (hopefully) can’t wreak havoc on them! Forming a gallery wall, whilst not the most difficult thing to accomplish, isn’t the easiest thing either. For one, you may struggle to find enough photos that you are happy to put up on display, or you may feel that the photos still don’t really make space feel alive or give it character. It may be that your photos themselves lack character, try to go for fun, impromptu shots that exude a fun vibe. You could potentially book a photoshoot to try to achieve that same effect. Equally, be sure to dust off every last album and even check your devices for quirky shots that are a great reflection of you and your family.
Complementing Colours
Survey your surroundings, and consider whether they would benefit from some vibrancy or colour, or if they’re better suited to more neutral and classic tones. Remember that the colour of your walls will have a sizeable impact on the photos you place on the wall – make sure they aren’t too samey, but that they don’t clash either. Consider of course, what colour your photographs are – is there a theme? Are they black and white? Are they all in colour? Or are they a mix of both? Depending on how old the photo is, it may have even begun to fade as it ages – in some cases, this could be to your advantage, but in other cases less so.

A display may work better if you use similar photos for the sake of uniformity i.e. all black and white or all in colour, or alternatively similar frames. Matching some aspect of the photo (its frame, colour, theme etc.) is a great way to create a symmetrical display that could be much more pleasing to the eye. It’s also handy for making a display feel complete and finished, rather than lacking in something you can’t quite put your finger on. Try to make sure that the surrounding decorations also benefit the photographs in some way, so that the different aspects of the room work together instead of against each other. You could endeavour to match the frames or the photos with the furniture in the room, or even the walls or wallpaper.
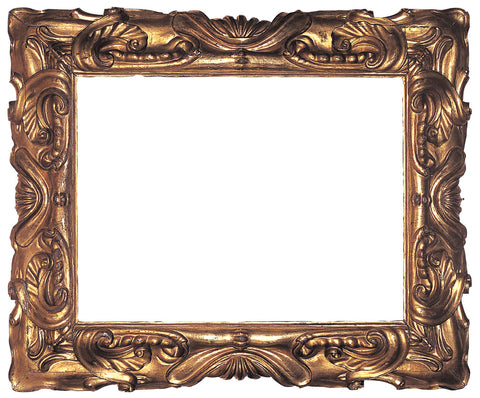
Black and white is a particularly popular theme with gallery walls, and it’s easy to see why – you can never go too far wrong with it! It is a classic combination that has withstood the test of time and trend. The photos themselves look sophisticated and chic. It also makes choosing frames and other colours for your room a lot easier, as you can stick with neutral and safe colours, that can be swapped out for something for bold and daring once you feel ready for it. It’s difficult to control the array of colours that will be present in our photos, with scenes of holidays and vivid celebrations, and this can be a problem when you try to balance these colours out to create a cohesive display – it can sometimes just come across as a bit of a mess. You may want to consider converting these photos to black and white or making a copy and then converting those specifically for your display. Another sneaky advantage is that the photos won’t fade or yellow as quickly, if at all, and so can maintain their charm for decades to come. To balance out darker photos, go for a frame of a lighter hue and vice versa. You also have room to experiment with the colours and textures of frames, if you aren’t wanting a completely black and white makeover.
If you aren’t up for anything bold, don’t hesitate to still bring some lighter colours in, and maybe a few eye-catching contrasts here and there for something refreshing (providing it isn’t overdone). A more vintage and retro look can be achieved by incorporating sepia tones into the frame or picking photos that may have naturally faded to take on a sepia hue. The shade gives a particular historical feeling and some may think it too formal for their bedroom when others find it to be their cup of tea. Once again, a bold frame may complement the photo nicely. For a more colourful gallery go for more light and airy tones like white and yellow, that bring more of a fun and easy-going vibe rather than the more formal, neutral tones. You could even experiment with the likes of ombre frames if you really want something out there!
Displaying Your Frames
Whilst the photos you choose will certainly take centre stage, do not underestimate the importance of how you display them. Your family photos need not stick out like a sore thumb, you can incorporate into your home in such a way that they can also contribute as a design element rather than just something as sentimental and personal. Before anything else, you need to pick a wall (or more than one) that is looking bleak and tired, or maybe was once very fashionable but has now lost its charm. You may want to consider spaces such as empty walls or the wall running up a staircase, or even something like a bathroom! Try and identify which wall your eye is naturally drawn to first when you walk into a particular room – that is a particularly favourable wall to upgrade as it makes an impact right away. You may also look at awkward small spaces that maybe don’t suit typical decorations like art or flowers, but are still crying out for a bit of attention.
Evaluate what kind of structure you want to order the photos in – something rigid and organised, like a straight line? Or would you prefer something more relaxed like photos spread loosely on the wall? This will largely hinge on what kind of atmosphere your room has or you want it to have. Think how much room you have to work with – is it an entire wall? Or just a few spots that have been neglected? Is it taller than it is wide? Or the other way around? All of these will give you an idea of whether you want to hang up the entire family album or just a few of your favourites! It is important to plan ahead of time what kind of general theme your photos and frames are going to have, and it may just be that you want a more varied mix to keep onlookers on their toes! Either way, make sure you know how many photos and exactly which ones you are working with, rather than leaving that till last. When it comes to actually displaying, very few people will tell you it’s easy, but once you hit the sweet spot you will have something incredible to be proud of.
Most likely the most important reason to plan is that any mistakes made will be very costly and time-consuming! A misplaced nail or hole will be very difficult to rectify, and may get you into hot water with your landlord if you are renting! If you are unwilling to commit to a certain design just yet, it could be worth starting off with a very simplistic gallery wall and then building and developing it as you become more confident about your ideas and also have more photos that you may want to hang up! If you do not have an entire wall to work with you may want to opt for a collage or a multi-frame, as these can enable you to fit the same amount of photos into a smaller space. Make sure the photos don’t come across as too crammed or unkempt unless messy is the kind of vibe you’re going for.
A hanging kit could make life a lot easier when it comes to actually making the gallery wall a reality. Once you have your particular mix of photographs, framed or unframed, and you know your look – chic modern, abstract, traditional etc. you could start with a simple grid and then envision your gallery wall from there. Try and ensure your gallery wall is the real focal point of the room rather than having it fight for attention with another statement piece, as a clash like this can be rather unsightly. Perhaps place your photos above your sofa or television. If you are going to put photos near furniture, ensure that they complement each other in terms of colour, as this will greatly enhance not only the photos but the furniture too.
Framing photos is not an unspoken rule or a requirement. Sure it can often make a photo feel complete, but you can hang unframed photos on a line like you might do with your laundry, or find another quirky but refreshing way to display photographs. You could potentially buy one large frame and then insert lots of small photos into it for something different. You may need to trim photos for this – making them all of equal proportions will add to a clean and stylish look. Other unconventional ideas could be displaying photos on a ladder (if you have a stepladder lying around!), putting photos into charming little bottles, making a wreath or hanging photos from fairy lights. There are a million more ways to display them, it all depends on who you are and what you like.
Achieving an Atmosphere
Photographs are particularly apt at bringing some warmth and comfort into bare and cold rooms. Tell the story of your life, or your family’s life by making a chronology of family photos for guests to delve into and delight at. Be creative! You need not restrict yourself to only frames, if you make effective use of shadow boxes you can add some depth and variety to your gallery wall! You can use them to display a few photos at once – perhaps ones in the same settings or with a similar colour scheme for some cohesion. You could mix up larger photographs with smaller ones, or even try hanging similar photos or pieces of wall art together so that they come together to make “one” large picture – it’s tricky, but for some of you who are more advanced when it comes to design, it could reap great rewards! And it certainly makes a great statement piece on an accent wall.
If you want a country and homely atmosphere within your walls, retro decorations like an old record player or shop sign can help you achieve just that. Similarly, using old-fashioned frames for photos creates an aura of mystery and class around them. If you’re feeling really sentimental, try something like quotes or flower decorations or hearts around the photos of those you hold near and dear, to really make a statement! If the photo is more nonchalant you can decorate its surroundings quirkily with textiles or stickers to enhance the relaxed and fun vibe.
Personalise your frames or photos with special names or important dates so that you always reminded of your favourite moments and your favourite people in life. You can also blow a photo up onto a canvas if you are after something unapologetically big and bold, which is particularly suited to walls that have a lot of empty space going to waste. You could also personalise each frame – whilst this will certainly take more time and effort than buying a few frames, it can be worth its while. It ensures that the gallery wall does not become boring or uninspired but instead that instead there is a little uniqueness in each frame, and something new to discover each time. Go wild! Use gems, jewels buttons, sequins, cloth, crayons and anything else that you think will work. Getting other family members to personalise a frame can be an enjoyable communal activity. It can also be immensely fun to display your photos in a certain shape, for e.g. a tree or a cat, as it adds some more charm to the wall and often is very eye-catching, not to mention it allows you to put your creativity to good use!
How to Hang
If you are renting, you may not have the scope to be able to put holes in any of the walls. If that is the case you can still make a gallery wall work! You could use hanging strips, which are capable of holding up frames instead of the traditional nails on the wall. You can also chop and change photos with ease, which is not always a flexibility you get with a nail in the wall. In the event that you can use nails but only a limited amount, you could look into attaching shelving units on the wall, and then displaying photographs on those. Once again, you can rotate your photographs whenever you see fit so that all of your favourite photos can enjoy their time in the spotlight. You will use considerably fewer nails when hanging up a shelf than when hanging up each individual frame. You could also take inspiration from museums that use cables to hang up artwork so that it is simple to swap out one picture for another whenever it is required.
Touching on the practical side, you may be satisfied with making simple markings wherever you want to place your nails, making sure they are the correct distance away from each other and then getting on with the physical work. Others who want to be a bit safer, perhaps because you are still a beginner, could take measures such as tracing frames onto paper and then sticking the paper up to get an idea of measurements and distances. You can also experiment with the placing of the frames with this method, leading to a better end result, especially because you are at less risk of making a mistake!
If you are struggling for ideas about how to hang your photos, try this: put three photos that are identical in colour and size in the middle of your display – this will create a centrepiece for the centrepiece. Try and make them around eye level, the recommended distance is 60”- 66” or 152 - 187 centimetres off the ground. However, if you have very high ceilings, it would be worth hanging them a little higher up than normal. Once you have hung these three frames, you can take the display in any direction you wish. You could put rows of photos around your centrepiece, maybe making a specific shape or just placing them in neat and clean rows. You could make a cute little set of stairs by placing each frame slightly higher than the one before. Frame risers can bring your photo off the wall for a 3D kind of effect, bringing a new dimension to your wall. If you opt for shelves as suggested before, you can still experiment with a display by creating a pyramid effect. This would be achieved by putting the most amount of photos on the lower shelf, and then decreasing the numbers you go up the shelves, leading to a peak or tip.
If you are still enticed by the classic option of a row of frames, use some pins and thread/string to ensure that the line really is straight rather than wonky, which would inevitably ruin the display. Of course, you can use the likes of a ruler and other DIY tools to ensure the line is straight, for if it isn’t there’s no point even bothering with the classic look! In a lot of cases, it is preferable to keep photos grouped firmly together, as it helps to establish the theme.
These are but some of the ways you can spruce up your walls if you have been looking for ideas. Whatever you decide to do with your photos, make sure you make good use of them so that they are reminders to you and your loved ones of memories that you cherish! And just to reiterate, planning is very, very important before you begin screwing in holes or hanging nails, because should you make a misstep it can turn out to be very bothersome, and then you will inevitably end up wishing you had planned better beforehand!
source https://www.otomo.co.uk/blogs/news/how-to-make-a-stunning-gallery-wall
No comments:
Post a Comment